Your iPhone, in Finder.No cable, no cloud, no Mac app.
iPhone and iPad

On your Mac you only need Finder: Go › Connect to Server.
For iPhone and iPad, with your Mac → your phone's files and drives as a disk in Finder · No account, no ads
Your iPhone, as a disk on your Mac.
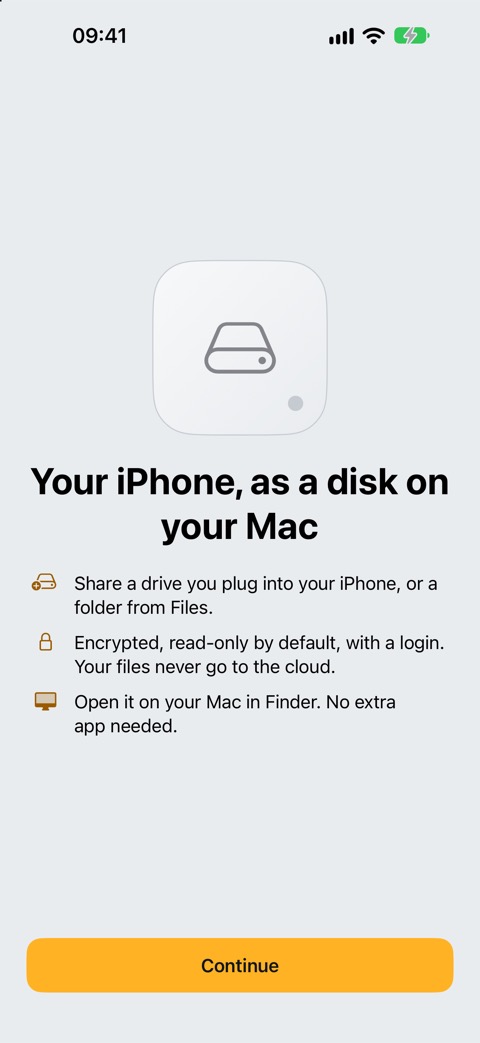
Open the files on your iPhone, and the SSDs and SD cards plugged into it, straight from Finder. Encrypted, with a password on every request, and read-only until you say otherwise.
A disk you already know how to use
DiskBeam shows up in Finder like any network disk, so you drag files in and out the way you always do.
Three steps, then it's a disk
No account, nothing to install on your Mac.

Get the app
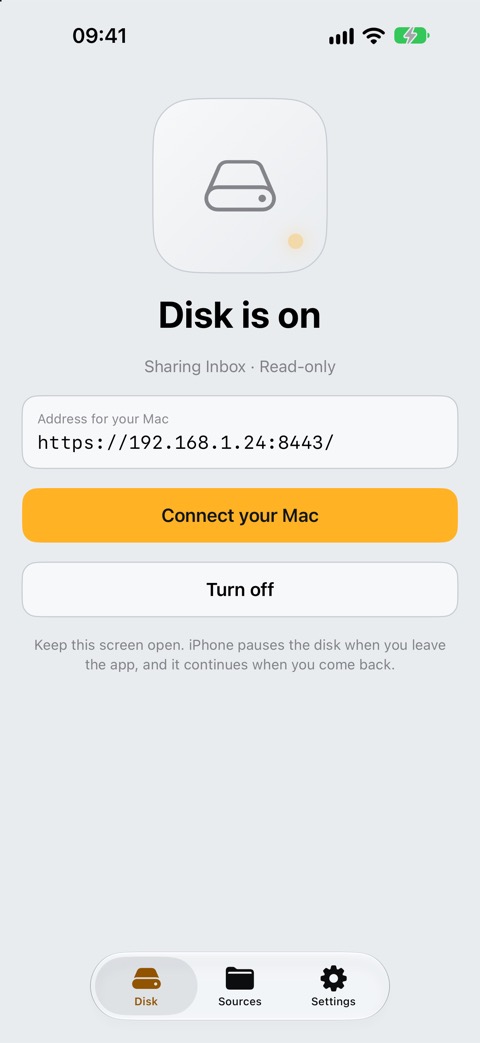
Install DiskBeam on your iPhone or iPad from the App Store and tap Turn on disk. Allow Local Network when iPhone asks.
Connect from Finder
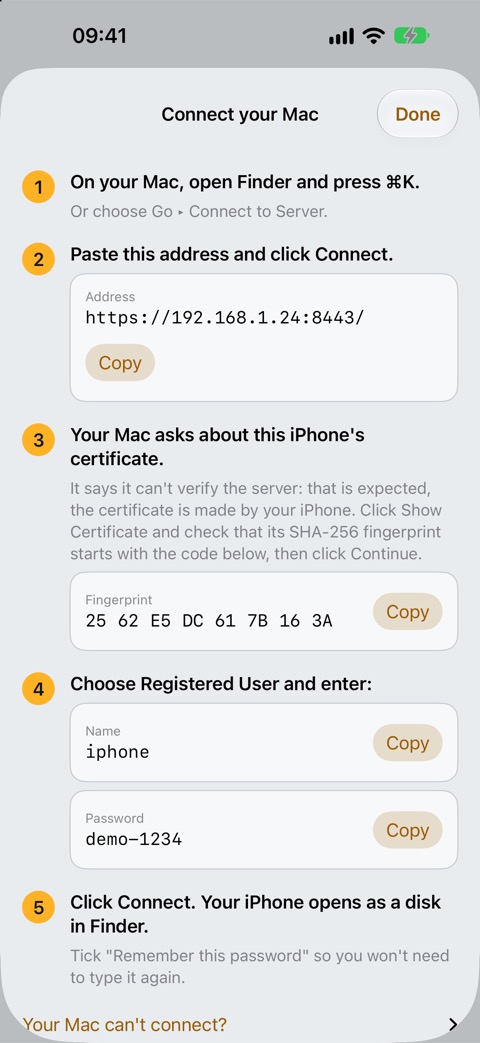
On your Mac, press ⌘K in Finder and paste the address DiskBeam shows. The first time, check the certificate code and click Continue.
Log in once
Enter the name and password from the app and tick Remember this password. Your iPhone opens as a disk.
Keep DiskBeam open while you copy: iPhone pauses the disk when you leave the app.
iOS 17+ · iPhone and iPad · No account
Your files stay between your devices
A disk shouldn't need a cloud, an account or your data.
No cloud, no servers
Files go straight from your iPhone to your Mac over your own network. Nothing passes through us: we have no servers that could receive them.
No ads, no tracking
No account, no analytics, no ads. The App Store label says Data Not Collected.
Locked down by default
Encrypted connection, a password on every request, read-only until you allow changes, and an optional timer that turns the disk off by itself.
Before you buy
Do I need to install anything on my Mac?
No. DiskBeam uses Finder's own Connect to Server (Go › Connect to Server, or ⌘K). Other apps that open network disks (WebDAV), such as Cyberduck, work too.
Does it work in the background?
No. iPhone pauses the disk shortly after you leave the app, and it continues when you come back. Keep DiskBeam on screen while you copy.
Why does my Mac ask about a certificate?
Your iPhone makes its own certificate to encrypt the connection, and your Mac doesn't know it yet. Click Show Certificate, check that its code matches the one in DiskBeam, then click Continue. You only do this once.
Which networks work?
Your Mac and iPhone on the same Wi-Fi, your Mac on your iPhone's Personal Hotspot, or a cable between them. Guest and hotel Wi-Fi often block devices from seeing each other.
Can I share a drive plugged into my iPhone?
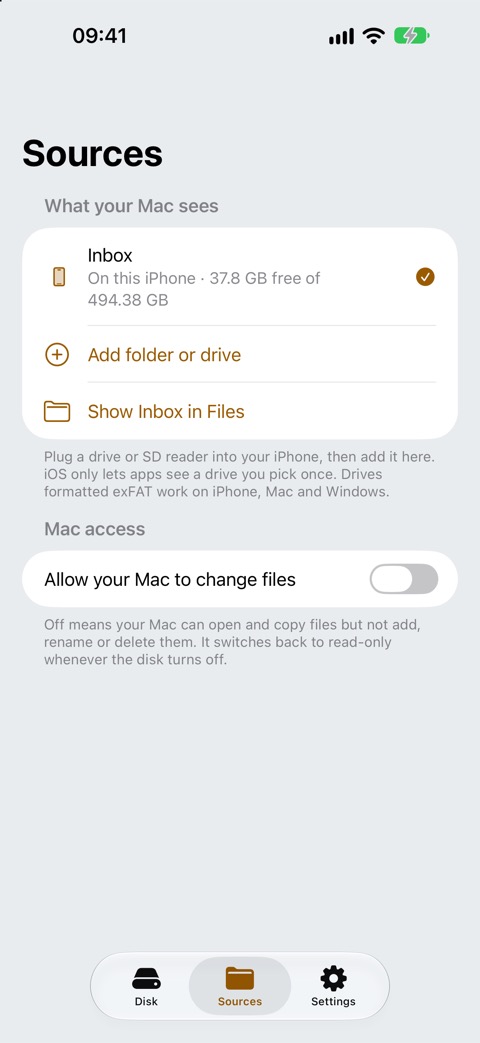
Yes, with DiskBeam Pro: plug in an SSD, a USB stick or an SD card reader, then add it in Sources. iOS lets apps see a drive you pick once; if you plug it back in later, you may need to add it again. Drives formatted exFAT work on iPhone, Mac and Windows.
Where do the files from my Mac go?
Into DiskBeam's Inbox, which is the Files app's On My iPhone › DiskBeam, or into the drive or folder you chose in Sources.
Is it safe on a public Wi-Fi?
The connection is encrypted and every request needs your password, so others on the network can't read your files or log in. Your Mac stays read-only until you allow changes.
What does it cost?
Sharing DiskBeam's own folder with your Mac, read-only, is free. DiskBeam Pro adds any drive or folder and lets your Mac add, rename and delete files: monthly with a 7-day free trial, yearly, or a one-time Lifetime purchase. Prices vary by country, and the App Store shows yours before you buy.
Is my data private?
Yes. No account, no ads, no tracking, no servers. Details in the Privacy Policy.
Free to start
Share DiskBeam's own folder with your Mac for free. Pro adds any drive or folder and lets your Mac change files: monthly with a 7-day free trial, yearly, or once for life.
Monthly and Yearly renew until you cancel. Lifetime is paid once. Prices vary by country, and the App Store shows yours before you buy.
Open your iPhone in Finder
Get DiskBeam, turn on the disk and press ⌘K on your Mac.
iOS 17+ · iPhone and iPad · No account, no ads